How to Mountain Bike Downhill and Uphill Like a Badass (I mean, confidently and safely)
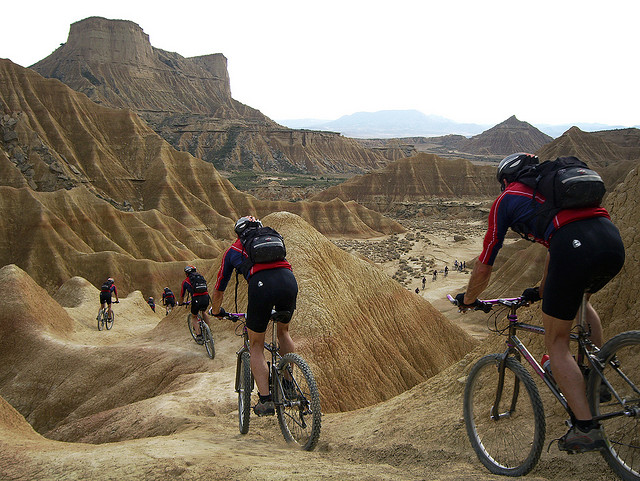

After five years of road cycling, I had never done any serious mountain biking until just a year ago. There are a lot of fresh concepts that simply don’t exist for bicycling on-road so I am very happy to share this information with anyone who wants to become badass at mountain biking. Before I continue, I’d like to say a big thanks to my brother who taught me a lot when I was first starting. I’ll never forget the first time we rode together he gave me a pep talk during the entire climb. So anyway, let’s begin with understanding how to position your body!
When going DOWNHILL it’s all about…
Location, Location, Loca… I mean… Position, Position, Position!!!
When you’re going down obstacles, you need to be standing with your butt placed so far back that your stomach may be hovering over the seat and your pedals are level. This is the key to maintaining stability to go over almost any obstacle, no matter how daunting, including stairs, boulders, you name it! This helps prevent you from doing an endo as well. Your pedals must be level all the times as well because if one is lower, you may hit something and that could cause a nasty crash.
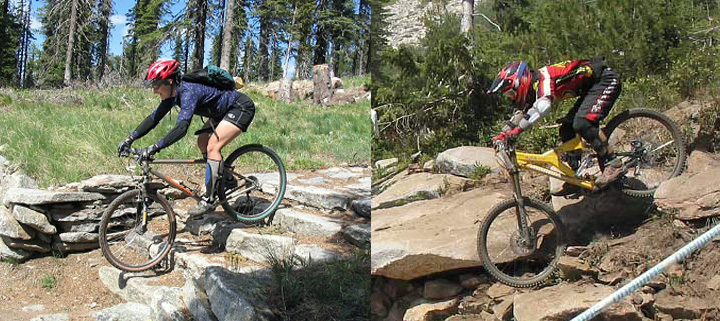
Even with a full suspension bicycle, the jolts are ultimately transmitted to your legs and arms. You always want your knees and elbows to be slightly bent so they are ready to take the bumps. You want the bike to float underneath you, with your legs acting as shock absorbers. And avoid gripping the handlebars too tightly. Relaxing your muscles is key to staying in control.
Don’t get STUCK in this position: The position I have presented to you above is very necessary on technical/serious steeps but you should not be STUCK in that position while going downhill the whole time! In fact, your positioning should be totally dynamic such that your body is centering to distribute weight as needed. Being super far back removes weight off your front tire and depending on the trail and conditions, you might not be able to turn. Also if your arms and legs are too stretched out, you lose your ability to pump and absorb the bumps. So keep that into account.
Going uphill, however, requires a totally different position
Climbing requires you to keep your butt planted on the seat and to lean your body forward with your elbows bent and back. If you stand up while climbing, your rear tire may break traction. Staying seated keeps weight on the rear wheel and leaning forward with your elbows tucked makes sure the front tire won’t lift up.
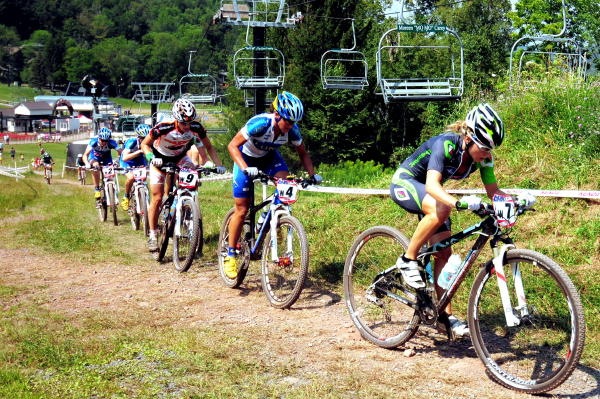
Again, don’t get STUCK in this position: The ever changing trail conditions will dictate how you should best distribute your weight dynamically. Sometimes you need to get your ass off the seat even while climbing.
Important: The initial setup before you ride!
Lower your seat: Normally when you go riding on the streets, you want your seat to be as high as possible without rocking your hips or locking your knees. However, when you’re mountain biking downhill, you want to have the seat very low.
Why is that? Well, since you’re going to be standing while you’re going downhill, you will be able to shift your butt way more rearward than it would otherwise be possible when your seat is low. Also, if you come to an abrupt stop for any reason while going downhill and your seat is high up, your family jewels will get smashed against the back of the seat and that will hurt like hell.
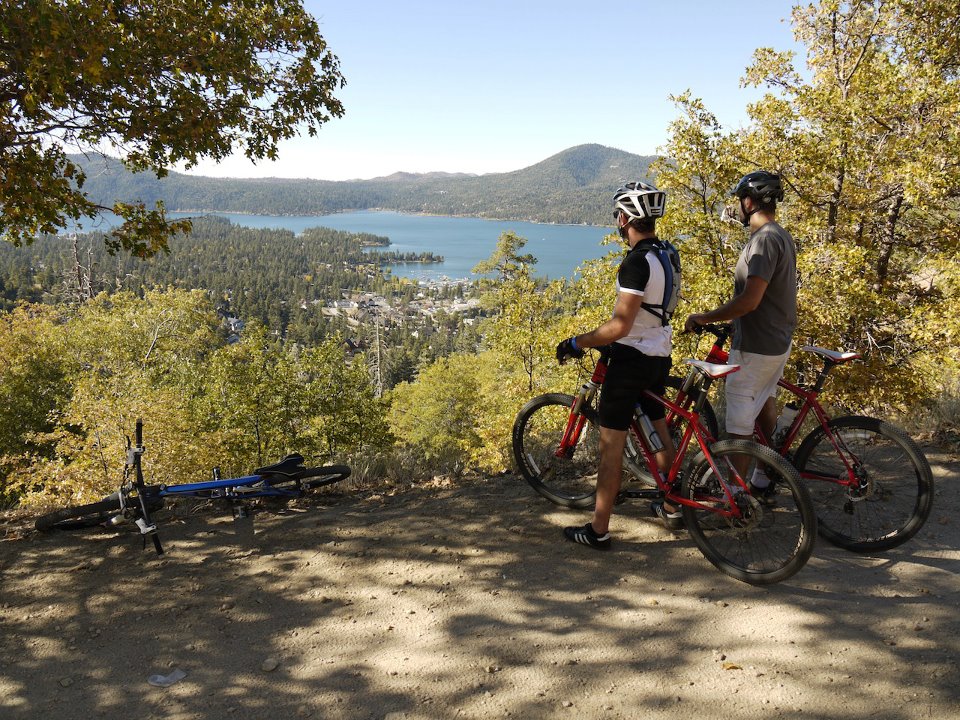
Don’t hesitate to raise your seat when going uphill: If you know you’re going to be climbing uphill for a while, like say, up to a viewpoint, then that means you’re going to stay seated for a long time. So take a moment to get off the bike and raise your seat so that you’ll be more efficient and avoid knee pain. When you’ve reached the crest and you know it’s time to go back downhill again, take a moment to lower the seat back down. Hopefully you have a quick-release skewer so that you could easily do this.

Tire choice: Every terrain requires a different type of tire so search relevant forums that discuss what is best in your local trails. Your local bicycle shop will probably have some valuable opinions as well.
Tires: Instead of having the tires pumped up to the max like you’d want for cycling on pavement, you want to do the opposite because the lower it is, the more traction you will have. Start with the front tire at 35 psi and the rear at 40 psi. Try dropping the pressure by 5psi to get more grip and see how that feels. You want to try to get away with as low of a tire pressure as you can without getting flats. The lighter you are, the lower pressure you could get away with. Trial and error is your best bet here. Also, learn to trust your tires shoulder as it can grip quite a bit when you’re cornering on top of ridges or near edges.
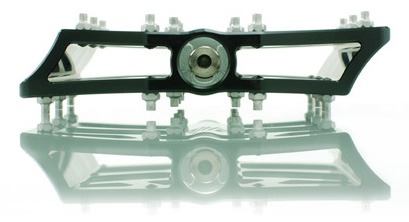
Get to know your pedals: It’s imperative that your pedals give you a secure connection between your feet and the bike. The couple times that I have crashed were because I was going around a bend and my shoe slipped off and caused me to lose my balance. They were flat pedals that had pins to dig into the shoe but they were only on one side! So please, inspect your pedals and make sure you’re standing on the side that has the most pins. If you want to look into pedals, here’s an excellent thread on platform pedal reviews but I would also recommend you consider toe clips or “clipless” pedals as well.
Fork: If you can adjust the preload (sag) on your fork, try running a bit less sag. If you have your fork set very soft, it will dive under braking and exaggerate the weight transfer, transferring more weight to the front of the bike, possibly causing an endo. For normal riding, set the preload so that when you sit on it, the fork compresses no more than 15% to 25% of total fork travel.
How to (not) brake (so much)
There is no substitute for experience when it comes to braking properly but I’ll try to take the mystery out of it to help you get a grip on the concepts. Keep in mind that anytime you press the brakes, anticipate the weight transfer by shifting your butt further back. Also, make sure all your braking is complete before the turn because braking and turning is asking for too much from your tires. So anyway, here are a few more tips!
Memorize which brake controls the front and rear: A bicycle is typically setup with the left lever being the front brake and the right lever corresponding to the rear but please verify this as not all bikes are the same. If you have a motorcycle, the setup is the opposite and it may be confusing to your muscle memory. Some people actually flip their brake levers to keep things consistent between their motorcycle and their bicycle. You don’t want to press the wrong brake (or just any brake) when you’ve got little room for error during some hairy section.
Treat your front brake as your primary brake. If you need to slow down just a bit, it doesn’t matter which brake you use, but if you need a lot of stopping power, your front brake is the boss. As long as you’re properly standing and have your weight shifted toward the back, you’re not going to fly over the handlebars just because you’re using the front brake. The rear brake has much less stopping power and skids very easily compared to the front. But of course you must not neglect the rear brake, it is necessary to use both brakes to get the most stopping power.
Practice threshold braking. Threshold braking is when you brake as hard as possible without locking up the tire or skidding. This will require some finesse but once you get the hang of it, you’ll be able to stay in control. This is especially helpful for understanding how you could use the rear brake for control.
Learn to let go of the brakes completely: When you first start mountain biking, it’s very common to constantly want to brake but please learn to completely let go, relax and trust yourself. If you’re going over a very large rock and you’re about to land but you’re braking lightly at the same time, what’s going to happen is that once you land, your hand may accidentally press the brake all the way due to the jolt of the landing, and that may cause you to go over your handlebars.
Side note: This is analogous to a phenomena in car racing called “lift-throttle oversteer.” If you feel your cars rear end is starting to slide out, usually the best thing to do is to stay on the gas to prevent the rear end from swinging out any more. If you lift off the throttle, or worse, press the brakes, it causes the car to dive forward, unloading weight (traction) off the rear tires, exacerbating the situation.
This excellent short video demonstrates the importance of letting go the brakes to pass through a section:
Important mental tips and tricks
So far we’ve gone over initial setup, positions and braking but this article wouldn’t be complete without understanding the mental side to things. I feel the following tips are as important as anything else because it helps tie everything all together.
Look as far ahead as possible, and look where you want to go: Even though your arms actually turn the handlebars, it’s your vision that determines your direction. Whatever you do, don’t look at the edges or right in front of your tire. If you look at the cliff, you will go down the cliff. Look ahead and look at the line you’re going to take through the corners coming up. The further ahead you look, the faster you’ll be able to go with confidence.
Steer with your hips: So when you’re trying to corner smoothly and with control, it helps a lot to have your body adjust to the dynamics of the turn as well. If you simply point your belly button in the direction that you want to go, your hips will turn in that direction. This will put more proper weight on the outside foot, providing more traction and allowing you to corner faster. So cornering is not just about turning the handlebars. It’s about moving your entire being fluidly through the turn. Couple the belly-pointing with looking ahead and your confidence will skyrocket!
Speed is your friend: When you first start mountain biking, you’re undoubtedly going to take it slow as you get used to it. Once you are warmed up and getting in the groove, increase your speed incrementally. Strangely enough, you’ll realize that riding without pressing the brakes feels safer than riding with the brakes if you just learn to let go and look ahead. Think light and image floating over the rough because that is what is going to happen if you allow yourself to.
If you’re constantly on the brakes, LOOK UP: If you find yourself constantly braking, you’re most probably looking directly in front of your tire. Look up. Look ahead as far as you can at where you want to go. Look deeper. You’ll instantly gain confidence when you know where you’re going as far ahead as possible. I said this before but it’s just that important!
If things start to get hairy: If the trail starts getting overly technical to the point that you can’t visually keep up with the ever-changing terrain, then slow down, recenter yourself and make sure you’re looking far down the road. Also understand that speed is a huge mental trick, the moment you think you’re going ‘too fast’ is when you will coincidentally start to lose control. The very concept of going too fast tells your body that you can’t handle this situation and your muscles tense up and you will lose your maneuverability.
So to recap…
Look ahead as far as you can at where you want to go. Try to get used to the idea that the faster you go, the safer you are. Always practice the proper body positions for going downhill and uphill. It will take some to get used to constantly standing with your pedals level but it is imperative you learn how to do these things the right way.
If you found a nice challenging trail, try going on that same trail over and over because you’ll get faster every single time when you know what to expect and that’s a huge confidence builder! Also, it’s not just practice that makes perfect but perfect practice that makes perfect, so always strive to perfect your line and actively correct your mistakes so you don’t repeat them.
Anyway, I hope that helps! Remember to always wear your helmet, wear gloves if you have them, wear protection if you got it and HAVE A BLAST! Happy trails!
