
How to Setup a Slackline (1-inch primitive line with carabiners)
I wanted to make a video showing how to set up a 1-inch slackline but the YogaSlackers company has already created a GREAT video that shows how. To help make it even easier for YOU, I made GIFs of all the steps so the important parts loop automatically so you don’t have to replay parts of the video repeatedly. So here it is: How to setup a slackline in 10 easy steps.
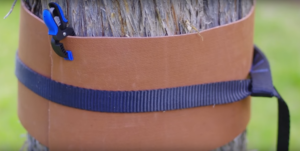
Step 1:
If setting up between two trees, put some tree protection to protect both the tree and your line from getting worn out prematurely. You could use cardboard, old yoga mats, carpet remnants or towels.
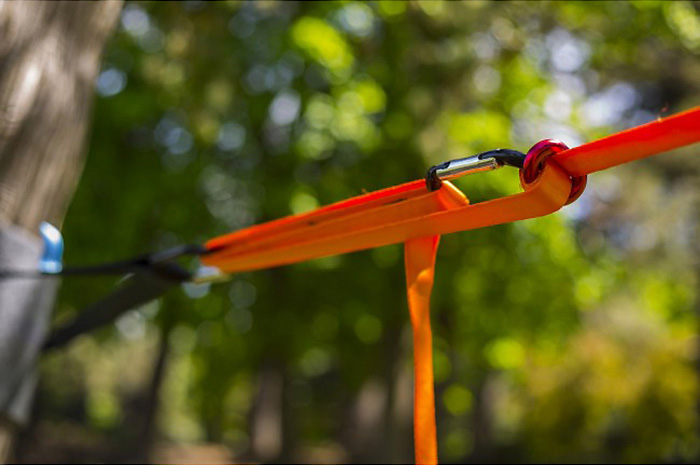
Step 2:
Adjust the anchor so it’s around hip-height (or lower if you’re new to this) and hook a carabiner through the end of the anchor piece.
Step 3:
Next, wrap the end of the slackline through itself on the other tree at the same height.
Step 4:
To help the line remain flat, you can pinch the line on both sides of the loop as you cinch the line tight around the tree. (You will get better at this with practice.) Then walk the line flat back to the other tree making sure there are no twists.
Step 5:
Next, you will need to put a line locker on the line. The line locker will go about 2 feet away from the carabiner.

Step 6: Create the line locker
Fold the part of the slackline where the line locker will go and push it through the line locker. Loop it around the top and feed it through a second time. Feed the carabiner through the second loop.
Step 7: Make sure the carabiner opens the same direction as the other one.
You may have to flip the carabiner to make them open on the same side as this little clip shows:
Step 8: Create the friction loop (called “z-drag”)
Now, you will take the slackline and loop it through the carabiner attached to the black strap but you must run it through by going from the bottom to the top of the first carabiner and then loop it through the second carabiner going from top to bottom. A gif is a million words:
Step 9: Repeat the same thing as step 8, except just slide the loop underneath the first loop.
Remember: Line goes bottom to top on the first carabiner, then top to bottom on the second one as you slip it underneath.
Step 10: Now pull the line to tighten and slackline!
The friction created from your primitive pulley system will hold it together! Ta-da! If you’re using a yogaslackers line it only takes a pull or two!
To de-tension the line, simply pull it away in the opposite direction and it will lose tension and come undone:
To store your line:
An easy way to store your line is to fold the line (so the line becomes half the distance) and then daisy chain the line like it shows below and it will save space and won’t be tangled when you want to set it up again.
Hope that helps!
Recommendation: If you need to buy a slackline, the one I recommend to all beginners is the YogaSlackers slackline The quality is very high and the webbing is of low-stretch, making stabilization much easier. This allows for more fun and less frustration! (The low-stretch webbing also means you can always tighten it yourself without the need for more carabiners to create a “multiplier” to increase mechanical advantage.) Even as you get more advanced, it remains a very fun line because it allows you to do more challenging moves without being overly difficult or dangerous to control.

Let’s Connect
The best way to stay up to date with the latest content and videos is to sign up for my newsletter!